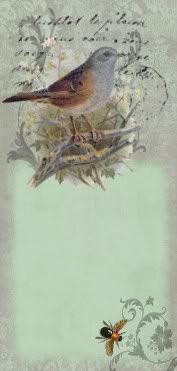
June 18, 2009

Garden Pixie

Say hello to my new Garden Pixie.

She's a bit shy, as you can tell from her - vavavoom! - outfit.

I'm still waiting for inspiration to strike me with the perfect name for her. Any suggestions?

I made this in a soldering class last night with a couple other ladies. A little tricky to get the hang of at first, but once you get it - very fun. I have been assured that my soldering skills will improve with time. Good to hear. I've got lots more of these babies planned!

There are four layers of glass, all sandwiched together, with a scrolly embellishment at the bottom and
a simple jump ring at the top for dangling purposes.

That's all I could manage in a 3 hour class.

June 16, 2009

Designer's Diner


Mom's cooking up a storm at the Designer's Diner!
Check out this scrumptious Father's Day flip album made with the YUMMY New Cosmo Cricket Early Bird Collection. Step-by-step tutorial below.

Best Dad Ever

COSMO CRICKETT
EARLY BIRD
FATHER'S DAY
FLIP BOOK

INGREDIENTS;
-5 PIECES OF PATTERENED PAPER
CUT TO 6X6 SQUARES.
-5 TOILET PAPER TUBES
-ASSORTED EMEBELLISHEMENTS
-GIFT CARDS,PAINT CHIPS, TINY ZIPLOCKS, GAME CARDS, COUPONS, TICKETS. ETC.

DIRECTIONS:
1. GATHER 5 TOILET PAPER TUBES
2. SQUASH THEM FLAT
3. IRON THEM FOR A SHARPER EDGE
4. CUT 5 SHEETS PATTERNED PAPER TO 6X6 SQUARES
5. GLUE BOTH SIDES OF TUBE
6. ADHERE PAPER AND CREASE SHARPLY
7. CUT A SLIT ON EACH SIDE
8. FOLD PAPER INSIDE OF TUBE
9. EMBELLISH EACH PAGE FRONT AND BACK
11. TUCK TAGS, CARDS, COUPONS IN SLOTS
12. USING A ZUTTER OR CROPODILE TO PUNCH HOLES
13. BIND WITH 2” ZUTTER WIRE, BOOK RINGS OR HEAVY CORDING.
14. PRESENT TO DAD, ALONG WITH YOUR ETERNAL GRATITUDE.

I gotta say, I love, love, love this new Cosmo Cricket Early Bird Collection. The paper is actually designed with a cookbook theme in mind, but I was so drawn to the colors and patterns that I was sure it could multi-task for Father's Day. It is heavyweight, printed on both sides and is made from mixed sources, recycled wood or fibre from well managed forests. Perfect for this upcycled TP tube project!

The base mini-album goes together very quickly and then the fun part begins - embellishing with all the doodads you can find.

I started the album out with a spot for a family photo and will sprinkle pictures of Dad doing something special with each kid on the rest of the pages. There are journaling boxes on each of page for a special note from each kid, as well as a place for photos.

Gift cards are the exact size to slide into the pockets with a perfect fit. I included a little ziplock with tickets for lawn mowing, fishing trip, car wash and a Costco hot dog, in the first slot. I then added in a Home Depot gift card glued to a paint chip. The Dutch Boy paint chips at Wal-mart fit perfectly and have a little square cutout for a photo.There is a certificate for a favorite meal (made with love), a Starbucks card for a cuppa Joe and an award for the Best Dad Ever.

As a finishing touch, I hung a tiny fishing bobber (found at the hardware store) on the spiral binding.

June 8, 2009

DIY Bird Feeder

I've enlisted the services of some treasures from the Bermuda Triangle Drawer
in my kitchen, (full of "mystery" pots, pans and parts) to create a new
bird feeder for the yard.

It was TIME!

The extra snow last winter left the old cedar feeder listing to one side. Just one more 3 point landing from a blue jay and the whole thing would be in the pond!

Here is the finished product of my endeavors, along with a tutorial, to inspire you to make one yourself.

Ingredients:
Bits and pieces of junky metal kitchen fodder.
I started off with a fondue holder, so I stuck to a round design. Square pans and lids make great bird feeders too.

1. Pizza pan base.
2. Burner drip pan.
3. Fondue holder.
4. Wok lid.
5. Dollar store decoration.
6. Caulk gun.
7. Pan lid.
8. Pop bottle.
9. Epoxy.

It was very easy to make, thanks to a tube of this super duper Epoxy. The open design and pop bottle insert make it really easy to clean, which is important for the health of your fine feathered friends.

Directions:

Stack things together first as a trial. Arrange all of your bits and pieces 'til you like them.

Remember, gravity counts!

Glue parts from the base up, with Epoxy. It takes 24 hours to fully cure, but you can handle it in a few hours.

Spray paint the whole contraption. Cut pop bottle top and bottom off to create a tube for the seed. (The bird embellished pot lid lifts off for easy refilling) Mount on a pole or add a hook and hang.

Fill with birdseed, then get your camera with zoom ready and go on assignment for the Audubon Society!

June 6, 2009

Way Cool!

It's been 
pretty warm 
and sunny 
here in the 
Pacific Northwest
this past week. 

That's something 
we're not used to 
in early June. 

So, I hauled out 
the old "finger chopper" 
fan ala fifties 
for a nightime breeze. 

Ours makes a big 
racket that kinda 
lulls you to sleep. 

Nice and cool.